Packaging Apps Intune | Endpoint Management
Thanks for visiting again, I know it’s been a while but I’ve been a little busy. So I thought I would share one of the latest projects and show how we Package applications for Microsoft Endpoint aka Intune.
I’m getting deeper into the world of Office 365 and more MDM, and it seems that Microsoft has changed the game. Where’s before I’ve worked with Citrix XenMobile (aka Citrix Endpoint management) and MobileIron, this deployment is another level. As Microsoft bundle, all the services and automatically configures Windows devices out of the box experience it’s no wonder companies are turning to Microsoft.
The SCCM world is now also using endpoint management to deploy applications to devices and that is what I am working on today. Apple has a similar setup with the Apple Business Manager and Managed App Store as to Google.
Let’s look at packaging Adobe Reader:
Step 1: One of the first things to do is get the installer for the application, now with Adobe you will need the network/Offline install file. At the time of writing, this was located at: https://get.adobe.com/uk/reader/enterprise/
The file size is around 200MB
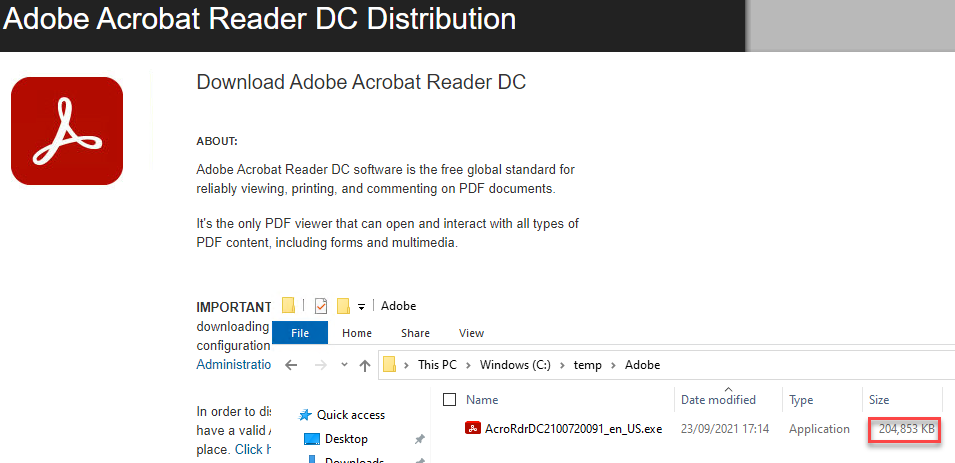
Now ideally you would have an MSI file and that would save some of the hard work, but in this case we have an .exe install file.
Step 2: Now we need to find out the Installer locations, Install and uninstall commands. In my experience this is simply install the application and find out the switches for a silent install.
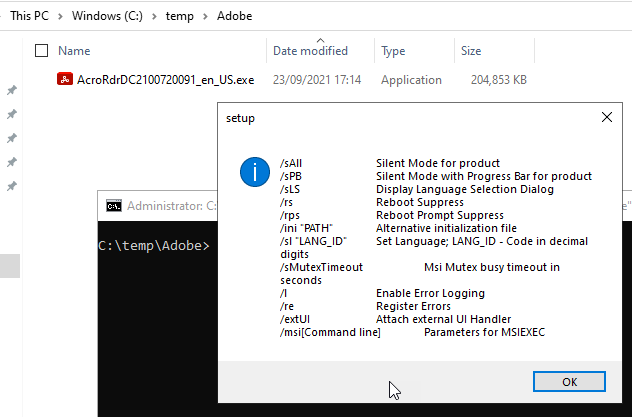
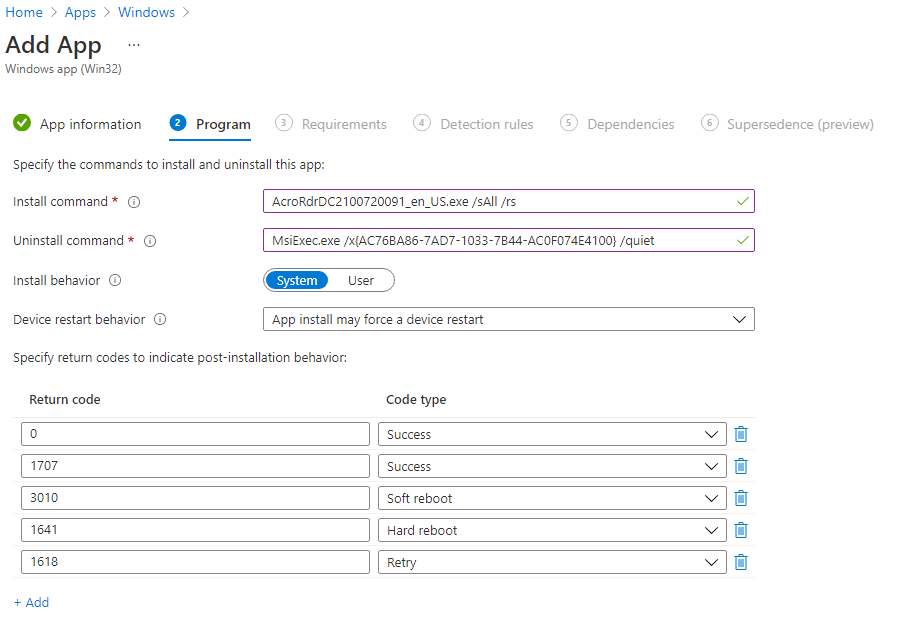
In this case, the install switch we want to use is /sALL and /rs which is Silent mode and Reboot Suppress.
Example: AcroRdrDC2100720091_en_US.exe /sAll /rs
This is all assuming that the user wants to install Adobe on their machine and they don’t have it already.
Step 3: When the Software has been installed we look at how to uninstall it, but also check the versions number or other metadata to later validate the software Installation rules.
Browse to the Adobe folder in file manager example: C:\Program Files (x86)\Adobe\Acrobat Reader DC\Reader
Click in the AcroRd32.exe file and get the properties, we are looking for the file version.

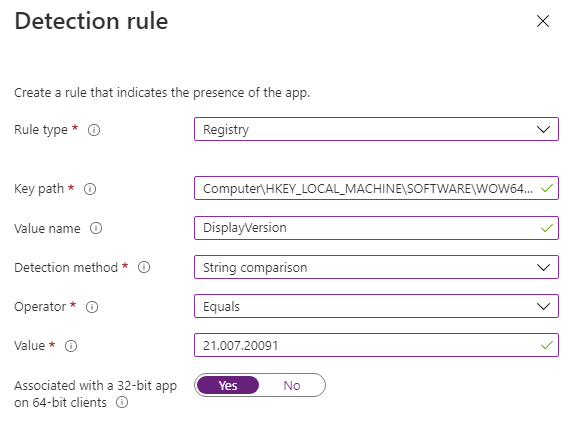
Step 4: Open the registry and browse to Computer\HKEY_LOCAL_MACHINE\SOFTWARE\Microsoft\Windows\CurrentVersion\Uninstall or Computer\HKEY_LOCAL_MACHINE\SOFTWARE\WOW6432Node\Microsoft\Windows\CurrentVersion\Uninstall\
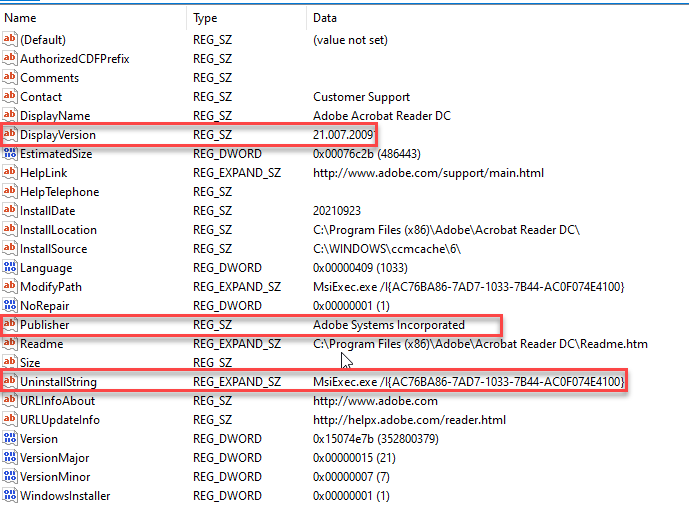
Make a note of the version number and Copy the uninstall string to notepad.
Note the application code may change between versions of adobe.
You will need to change the /I for /x and add quiet. for example: MsiExec.exe /x{AC76BA86-7AD7-1033-7B44-AC0F074E4100} /quiet
Step 5: Test Your Uninstall
Let’s run the command locally first to ensure the application uninstalls correctly.
Then check Programs & Features to see if Adobe reader has been uninstalled. Tech Tip: run appwiz.cpl from the command line to open this window directly 😉
If that worked its time to package the App into Intune.
Step 6: Intune App Packaging.
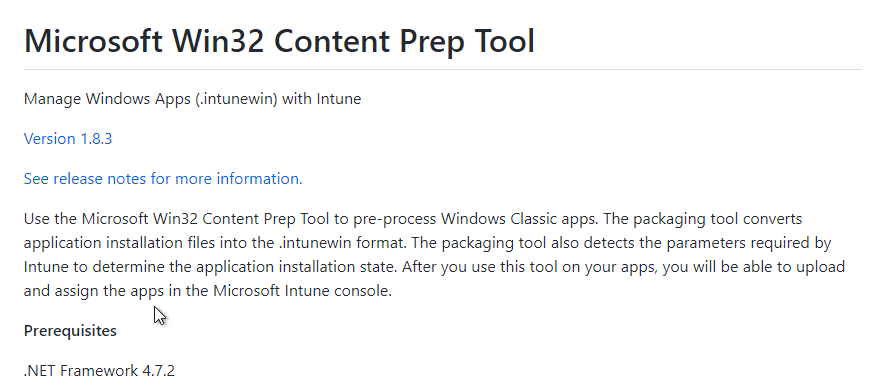
We need to get the Microsoft Win32 Content Prep Tool you can find this on GitHub: https://github.com/microsoft/Intune-Win32-App-Packaging-Tool
At the time of this post version, 1.8.3 was available
Download and Extract the tool, now before you run the tool, ensure the following.
Your Adobe exe or other App is in its own folder and you need an output folder too.
In my case, this is C:\temp\adobe and C:\temp\out for the intune package.
run the Application: IntuneWinAppUtil.exe and specify the locations.
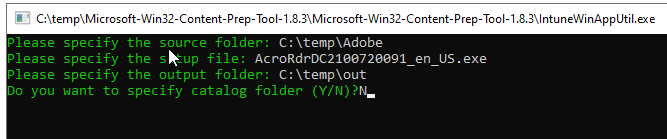
I chose not to catalog the folder as it’s not required.
Check the out folder and you should have an Intunewin file.
We will also need to grab the icon from the Application executable if one isnt separately available.
Getting Application Icon from an executable using PowerShell.
Add-Type -AssemblyName System.Drawing
$Path = “C:\Program Files (x86)\Adobe\Acrobat Reader DC\Reader\AcroRd32.exe”
$Icon = [System.Drawing.Icon]::ExtractAssociatedIcon($Path)
$Icon.ToBitmap().Save(‘C:\temp\icon.jpg’)
 Add-Type -AssemblyName System.Drawing
$Path = "C:\Program Files (x86)\Adobe\Acrobat Reader DC\Reader\AcroRd32.exe"
$Icon = [System.Drawing.Icon]::ExtractAssociatedIcon($Path)
$Icon.ToBitmap().Save('C:\temp\icon.jpg')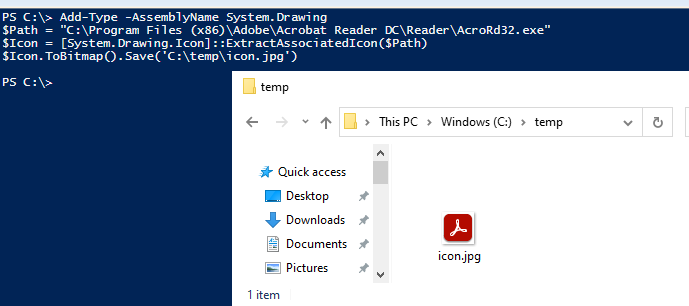
(Thanks to Sam Hepburn https://samhepburn.co.uk for this script, credit when due 😉
Step 6: Publish the Application in Intune / Microsoft Endpoint.
Here we going to publish and push the application to the desktops.
visit your Azure / Endpoint Management Portal. https://endpoint.microsoft.com
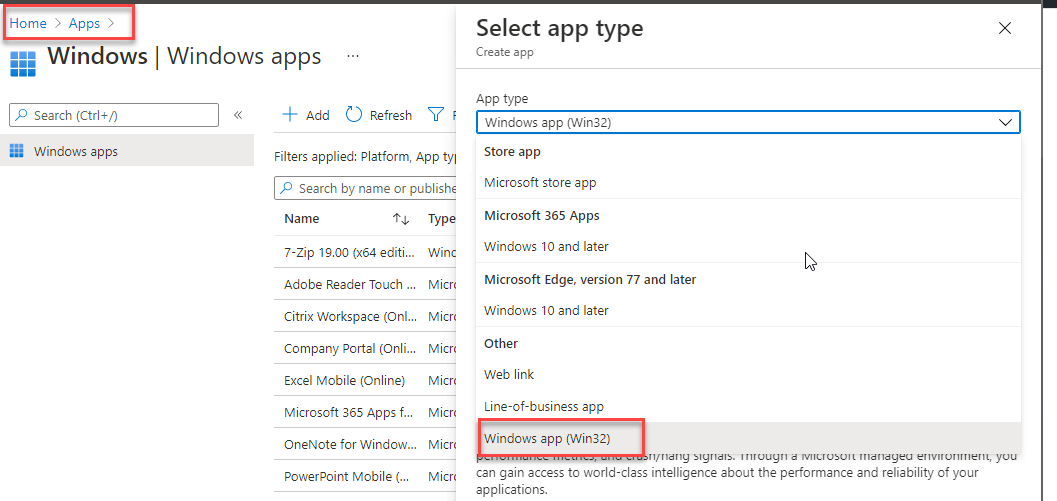
Navigate to Home > Apps > Windows
Then click Add and select Windows App (Win32) Doesn’t matter if you packaged a 64Bit Application it works the same.
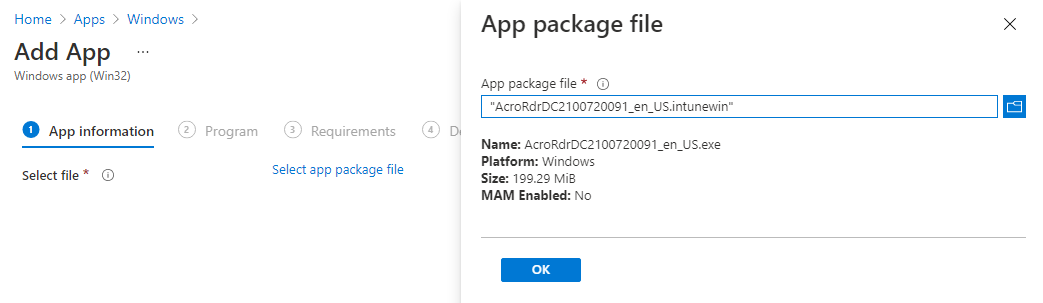
Next we are going to select the App package File we just created.
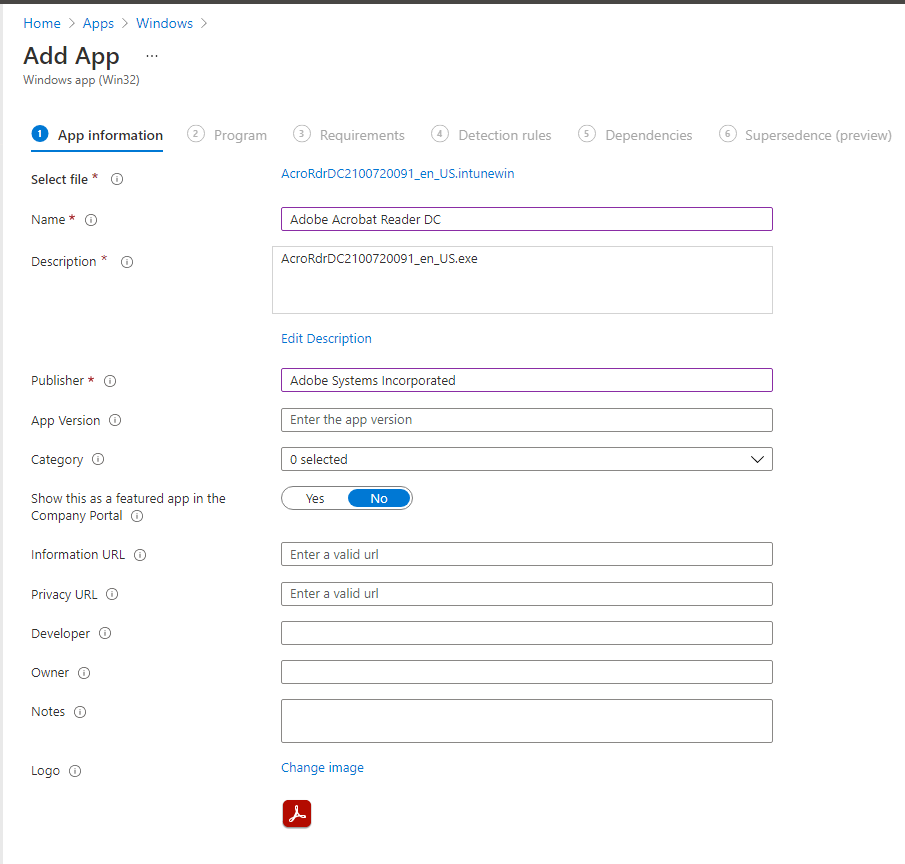
Next we need to provide additional information about the App, your need to include the name and Publisher
and this is where we need the icon too. The other fields are optional
Click next and this is where we need the Install and uninstall commands, fill this in from your notepad as collected earlier.
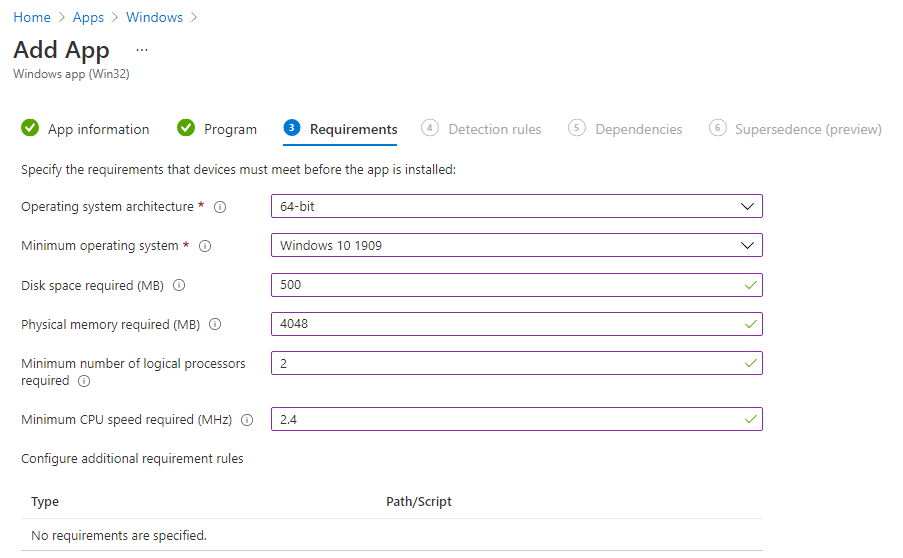
Next is requirements ands we need to specify the OS and System Architecture. In this case I’m selected x64 and minimum version of Windows 10 1909. You may want to check for disk space required and Memory, below is just an example:
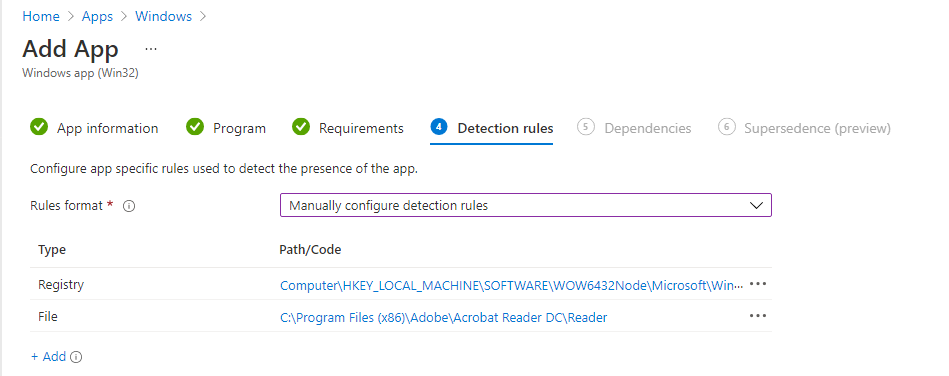
Next, we need to see if the application is installed correctly and there are a number of ways to do this, including path location and version number. If you used an MSI, these fields should automatically fill. In this case, we are going to use the registry and file.
Registry Version example:
File location example:
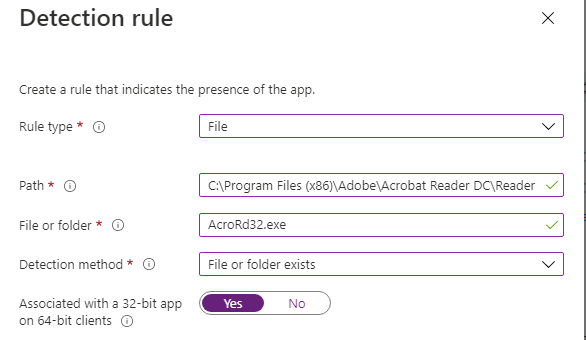
You can have both if required.
If there were any dependencies you could add them on the next tab, and supersedence is not required at this time.
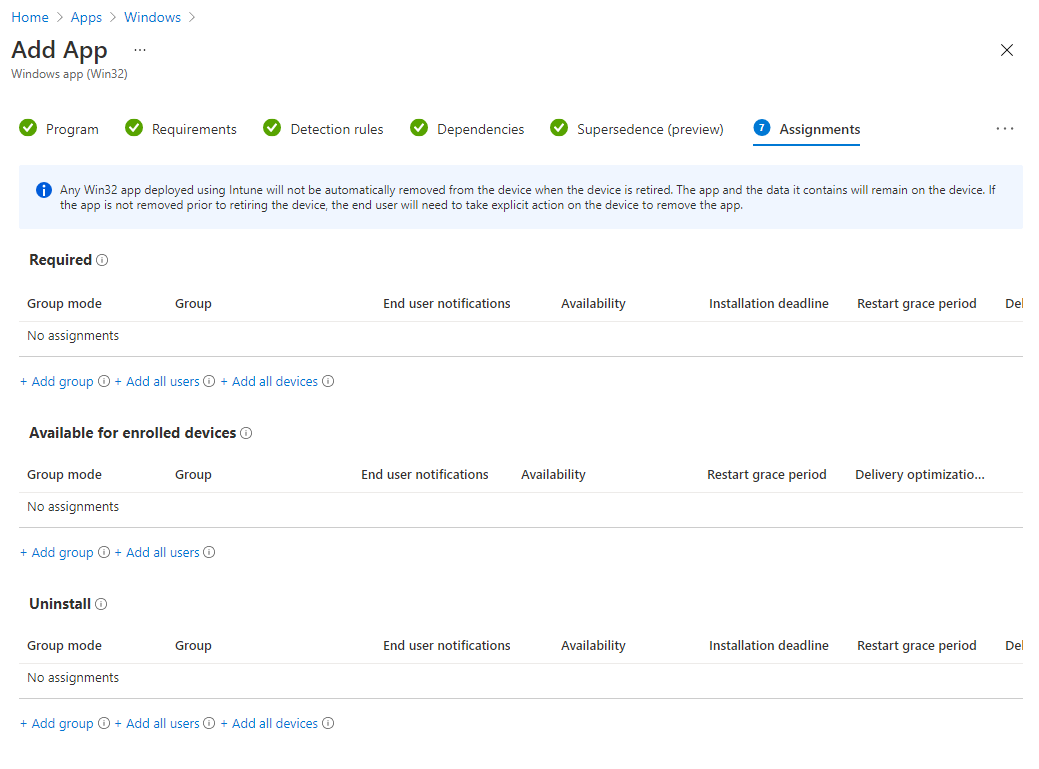
Finally assign a group to either Required or Available for enrolled devices. The uninstall section will remove the application if installed.
Create and then go an test, remember your dependency rules, if they are too strict they may appear as failed.
Thank you for reading my article, please be sure to visit my YouTube channel for technical videos.
https://www.youtube.com/channel/UCPVUHXg_pm4A0aTbch-kUAw